This is a copy of an article in the 2025 NIFG Newsletter.
DNA Sequencing – The Process from fungus to a possible identification
Recently I have been posting some sequencing results on the NIFG forum and added some reports onto the NIFG website Downloads page so I thought I’d give a bit of background what the process involves. We have been very lucky to have received funding from the CEDaR Environmental Recorders Group for a Bento Lab and supplies. A Bento Lab is a mini lab which provides the tools to allow the extraction and amplification of DNA that can then be sequenced by a large laboratory. They send me back a sequence which is a series of letters which I can then check against online databases to see if I can get an answer as to what the fungus is. So how does this actually work?
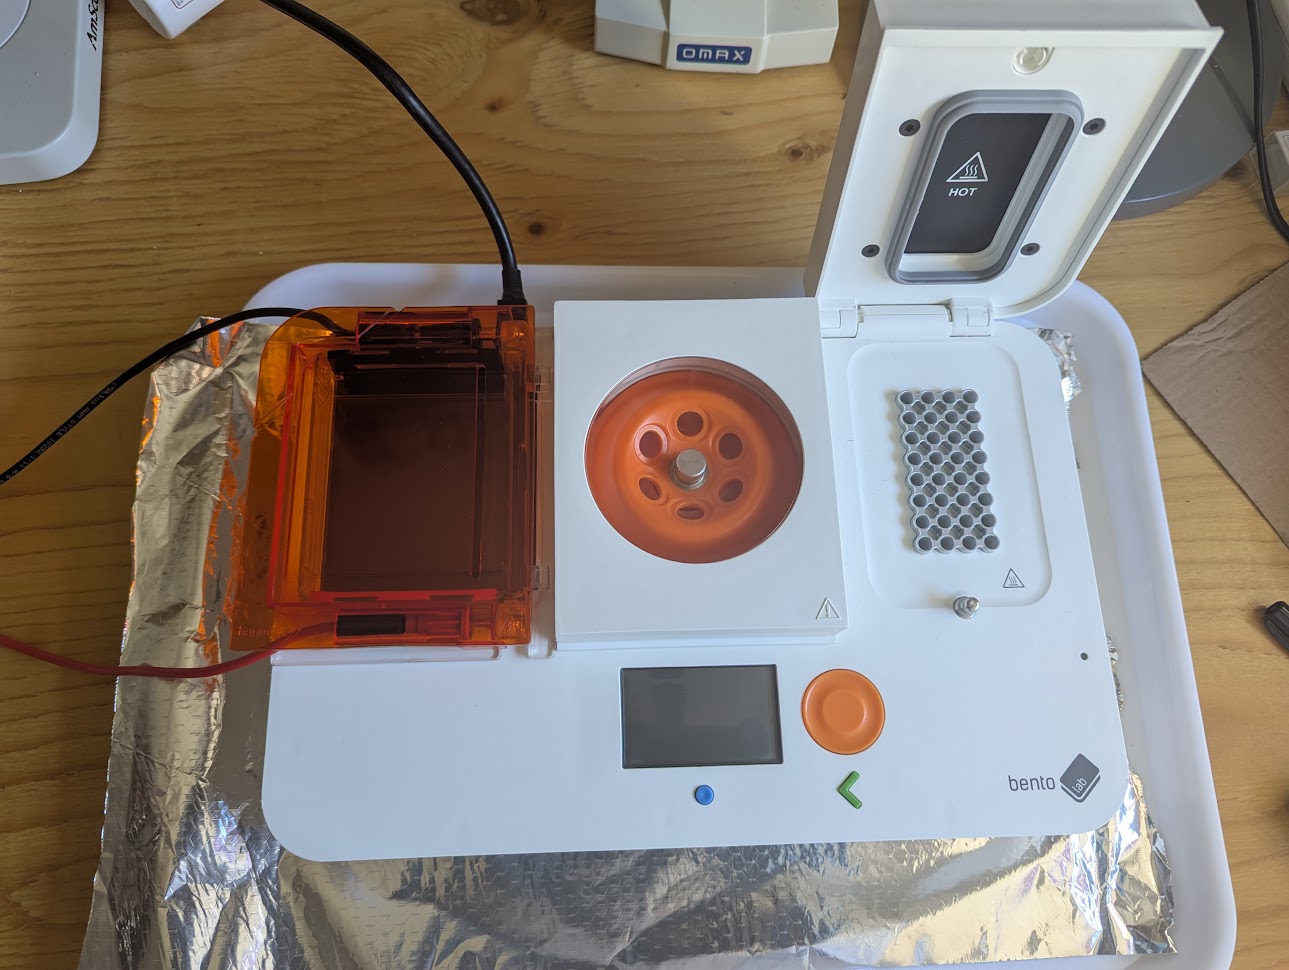
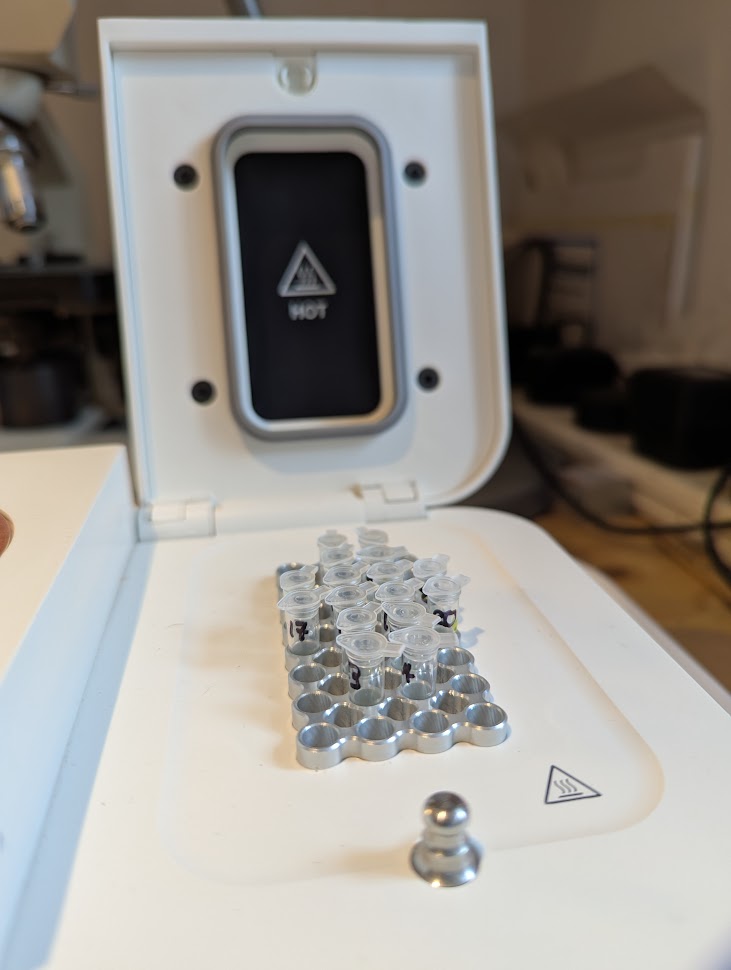
The Bento Lab with the gel tray on the left, mini centrifuge in the middle and the thermocycler for the PCR process in the middle
The whole process is very fiddly and there are so many things that can go wrong and contamination is the major concern. The fungus you are sampling from might be contaminated by a mould growing on it or you may cross contaminate your samples so everything has to be done very carefully. I have to change gloves with every sample so go through boxes very quickly. Each razor blade used in taking a sample is chucked out immediately. I am cleaning and cleaning and cleaning!
I usually take samples one day, leave them in the extraction buffer overnight and do the amplification stage the next day. This also helps keep the two stages separate reducing the risk of contaminating later stages with spores from handling the fungi. The equipment largely restricts you to 16 samples at a go but the extraction stage takes a couple of hours on day 1 and the amplification stage on day 2 takes 5-6 hours so it is not a small undertaking. Finally, the identification of the sequence can take anything from minutes to years…..
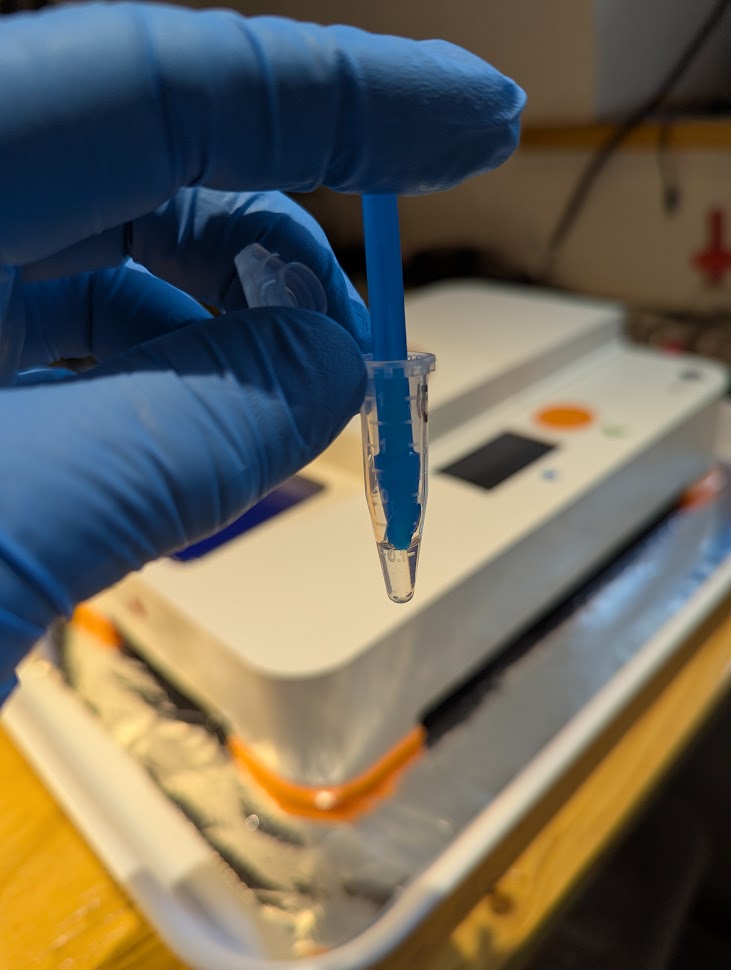
DNA is concentrated in spores so the best place to get a sample for DNA extraction is from the gills or pores if a basidiomycete. I only need about 2 square millimetres of sample so it is a delicate operation transferring such a small piece into a tube full of extraction buffer. Once the sample is in the extraction buffer, I mash it with a small pestle breaking the cells up so that the DNA is now floating in the extraction buffer.
Mashing the sample in Extraction Buffer
At the start of day 2, I prepare the PCR mix. The PCR process consists of three stages – the two stands of DNA in the double helix are split apart by heating, reagents called primers mark the target locus or section of DNA that contains the part of the genome that tells you most about which species it is (with fungi it is mostly the ITS locus although there are other loci that can also be useful) and then this section is copied or amplified so making it easier to get a sequence when you send it away. There are some fungi like some species of Hebeloma which cannot be identified by the ITS region alone but I only have access to ITS primers at the moment. A primer mix for plants would be different as they need different primers marking different sections of the genome added to the other reagents.
Once the primer mix is ready, I have to transfer the DNA in the extraction buffer to the primer mix and I use dipsticks for these. The dipsticks have cellulose ends and the DNA sticks to this. I dip the dipstick in the tube of extraction buffer and sample, then a couple of times in a wash buffer and then dip it in the PCR mix. This transfers sufficient DNA if I’m lucky. I then repeat for all 16 samples. Once done, I load the 16 samples into the thermocycler on the Bento Lab to run the PCR process. This takes about 2 hours to run.
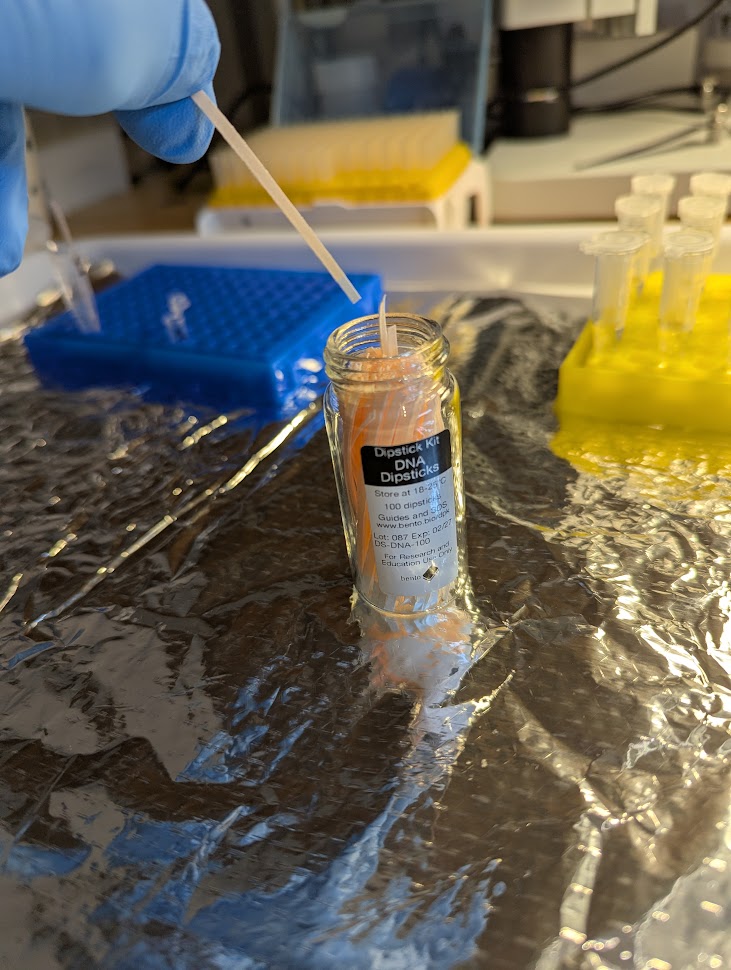
A dipstick to transfer DNA to the PCR mix
PCR tubes loaded into the Bento Lab thermocycler
Next is the most fiddly part. By running an electrophoresis gel, you can see if each sample has successfully had DNA extracted. Firstly, you dissolve an agarose tablet in some buffer and let the gel set into a jelly like form in the gel tray. Combs leave little slots into which tiny amounts of the PCR sample mix can be added. Using micropipettes this takes some practice!
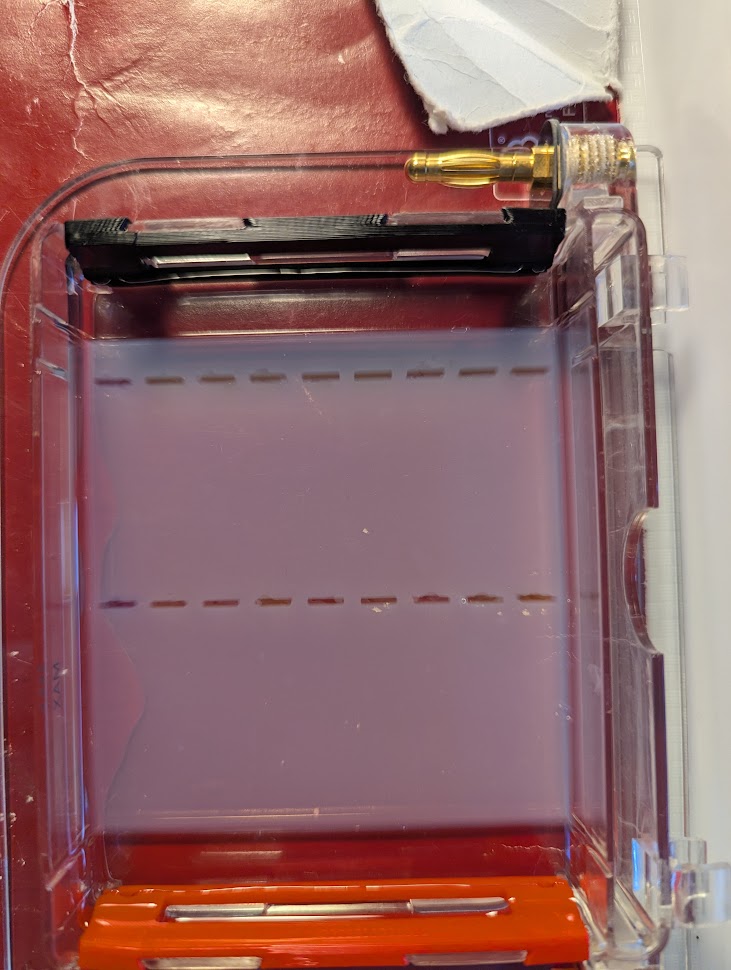
The gel tray ready for adding 3µl of PCR sample into each slot
You then link the gel tray into the Bento Lab and run the electric current across it for 45 minutes. Then the moment of suspense as you then can see if you have any DNA (and there are times I have had complete failures for various reasons).
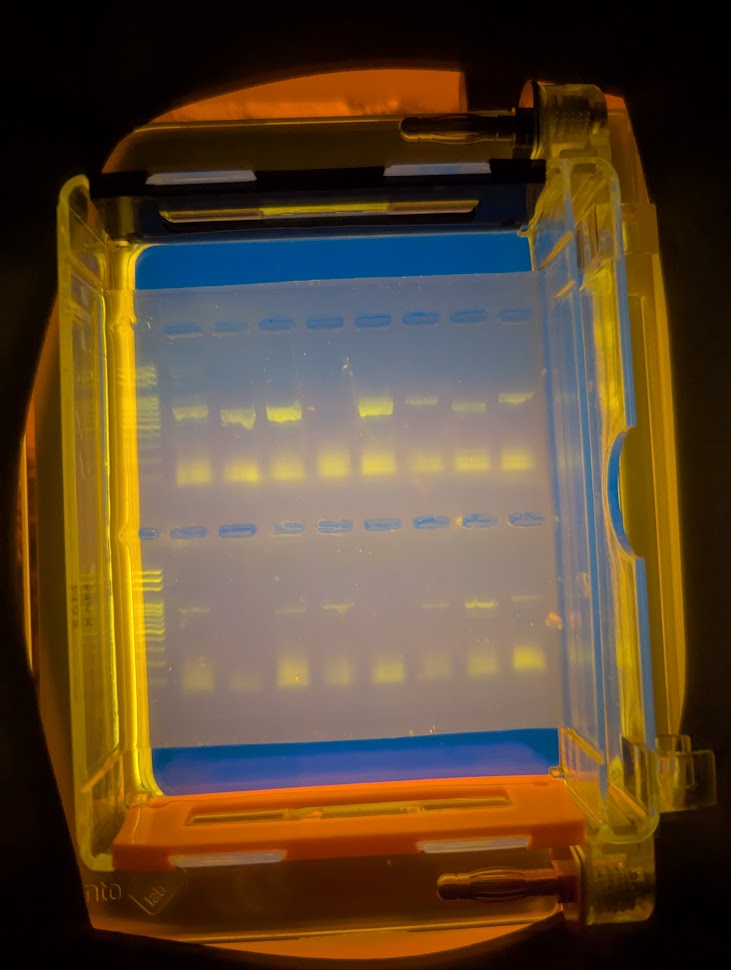
A Gel Result
So, in this example result, looking at the upper row of the two sections, samples 3, 5, 13 and 15 have either nothing or very faint amounts. The others are not too bad. This helps determine how much sample I send to the University of Aberystwyth for sequencing as although too little DNA is obviously a problem, so is too much and I need to send amounts based on the strength of these bands. A blank row does not necessarily mean there will be no sequence as I may have made an error in loading the sample into the gel tray but it does give a good indication. Likewise, a strong result may not give you a good sequence as it may be contaminated! Or the sequencing process could fail.
I post them express delivery and wait for the results. They are usually sequenced over the weekend and on the Monday, I get the results back. You get two files back by email for each sample. One the sequence file containing a long (hopefully) string of letters and the other is the chromatograph file from which the sequence file has been generated. DNA consists of just four bases, Adenine, Cytosine, Guanine and Thymine (A, C, G and T). In the double helix, A will only bind with a T on the other strand and C will only bind with G. As they don’t bind with themselves, when the two strands are “unzipped” in the PCR process, the two strands are not identical. When the University of Aberystwyth sequence my samples, I have to decide if I want them done as a forward or reverse sequence. Imagine it as the forward sequence from left to right and a reverse sequence as the bottom strand from right to left. As when a sequence is run, the primers slowly run out and the quality decreases as length increases. Hence, to get a better quality sequence, you can get two sequences in the opposite directions done, combine them and get better quality and longer sequences at both ends. However, as sequencing costs almost £5 a go, I only do this for key or difficult specimens.
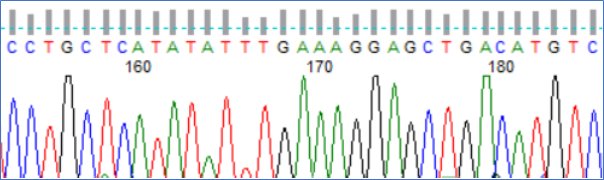
The chromatograph of a nice clean sequence with strong clean peaks
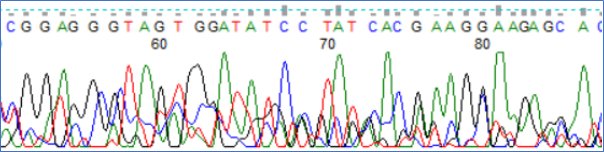
A very messy sequence with contamination
So the first step in interpretation is to determine the section of the chromatograph that is of good quality and clean and from that, the sequence file can be generated. I do get one from Aberystwyth but may alter the start and end of the sequence myself. The end result is a file that looks like this:
CAGGCAAGTTCCCAATGGTAGGACAATTGGTAGCCGACATTCAACTATATCCAGCAACAACACAGATAACTACTTATCAAATTGGAGCTGGTTACATGCTGTCCTGCTCATATATTTGAAAGGAGCTGACATGTCTTTTGCCAGCATACCTTCAACATCCAAGCACAACTTAAATTATTAGAACTTAGTTGTGTTGAGGAATAAATGACACTCAAACAGGCATACCCTCCTGTGTCAAGAGGGTGCAATATGCGTTCAAAGATTCGATGATTCACTGAATTCTGCAATTCACATTACATATCGCAATTCGCTGCGTTCTTCATCGATGCGAGAACCAAGAGATCCATTGTTGAAAGTTGTTTTAAATATTTTTATTACATTCTTCAACTTGTACTTTGGGGTATGTTAAAATCATAGGCAACAAGCAGGGGACAGTAAAGCCCCTTCCTTGCTTTCTTGCCTACAGAGTGTGCACAGGTGGATGGATATTAGGTTAGAGTGCACATGCAATGAAGCCAGCACATCCTTATTTTCTTTAATGATCCTTCCGCAGGTTCACCTACGGAAACCTTGTTACGACTTTTACTTCCTC
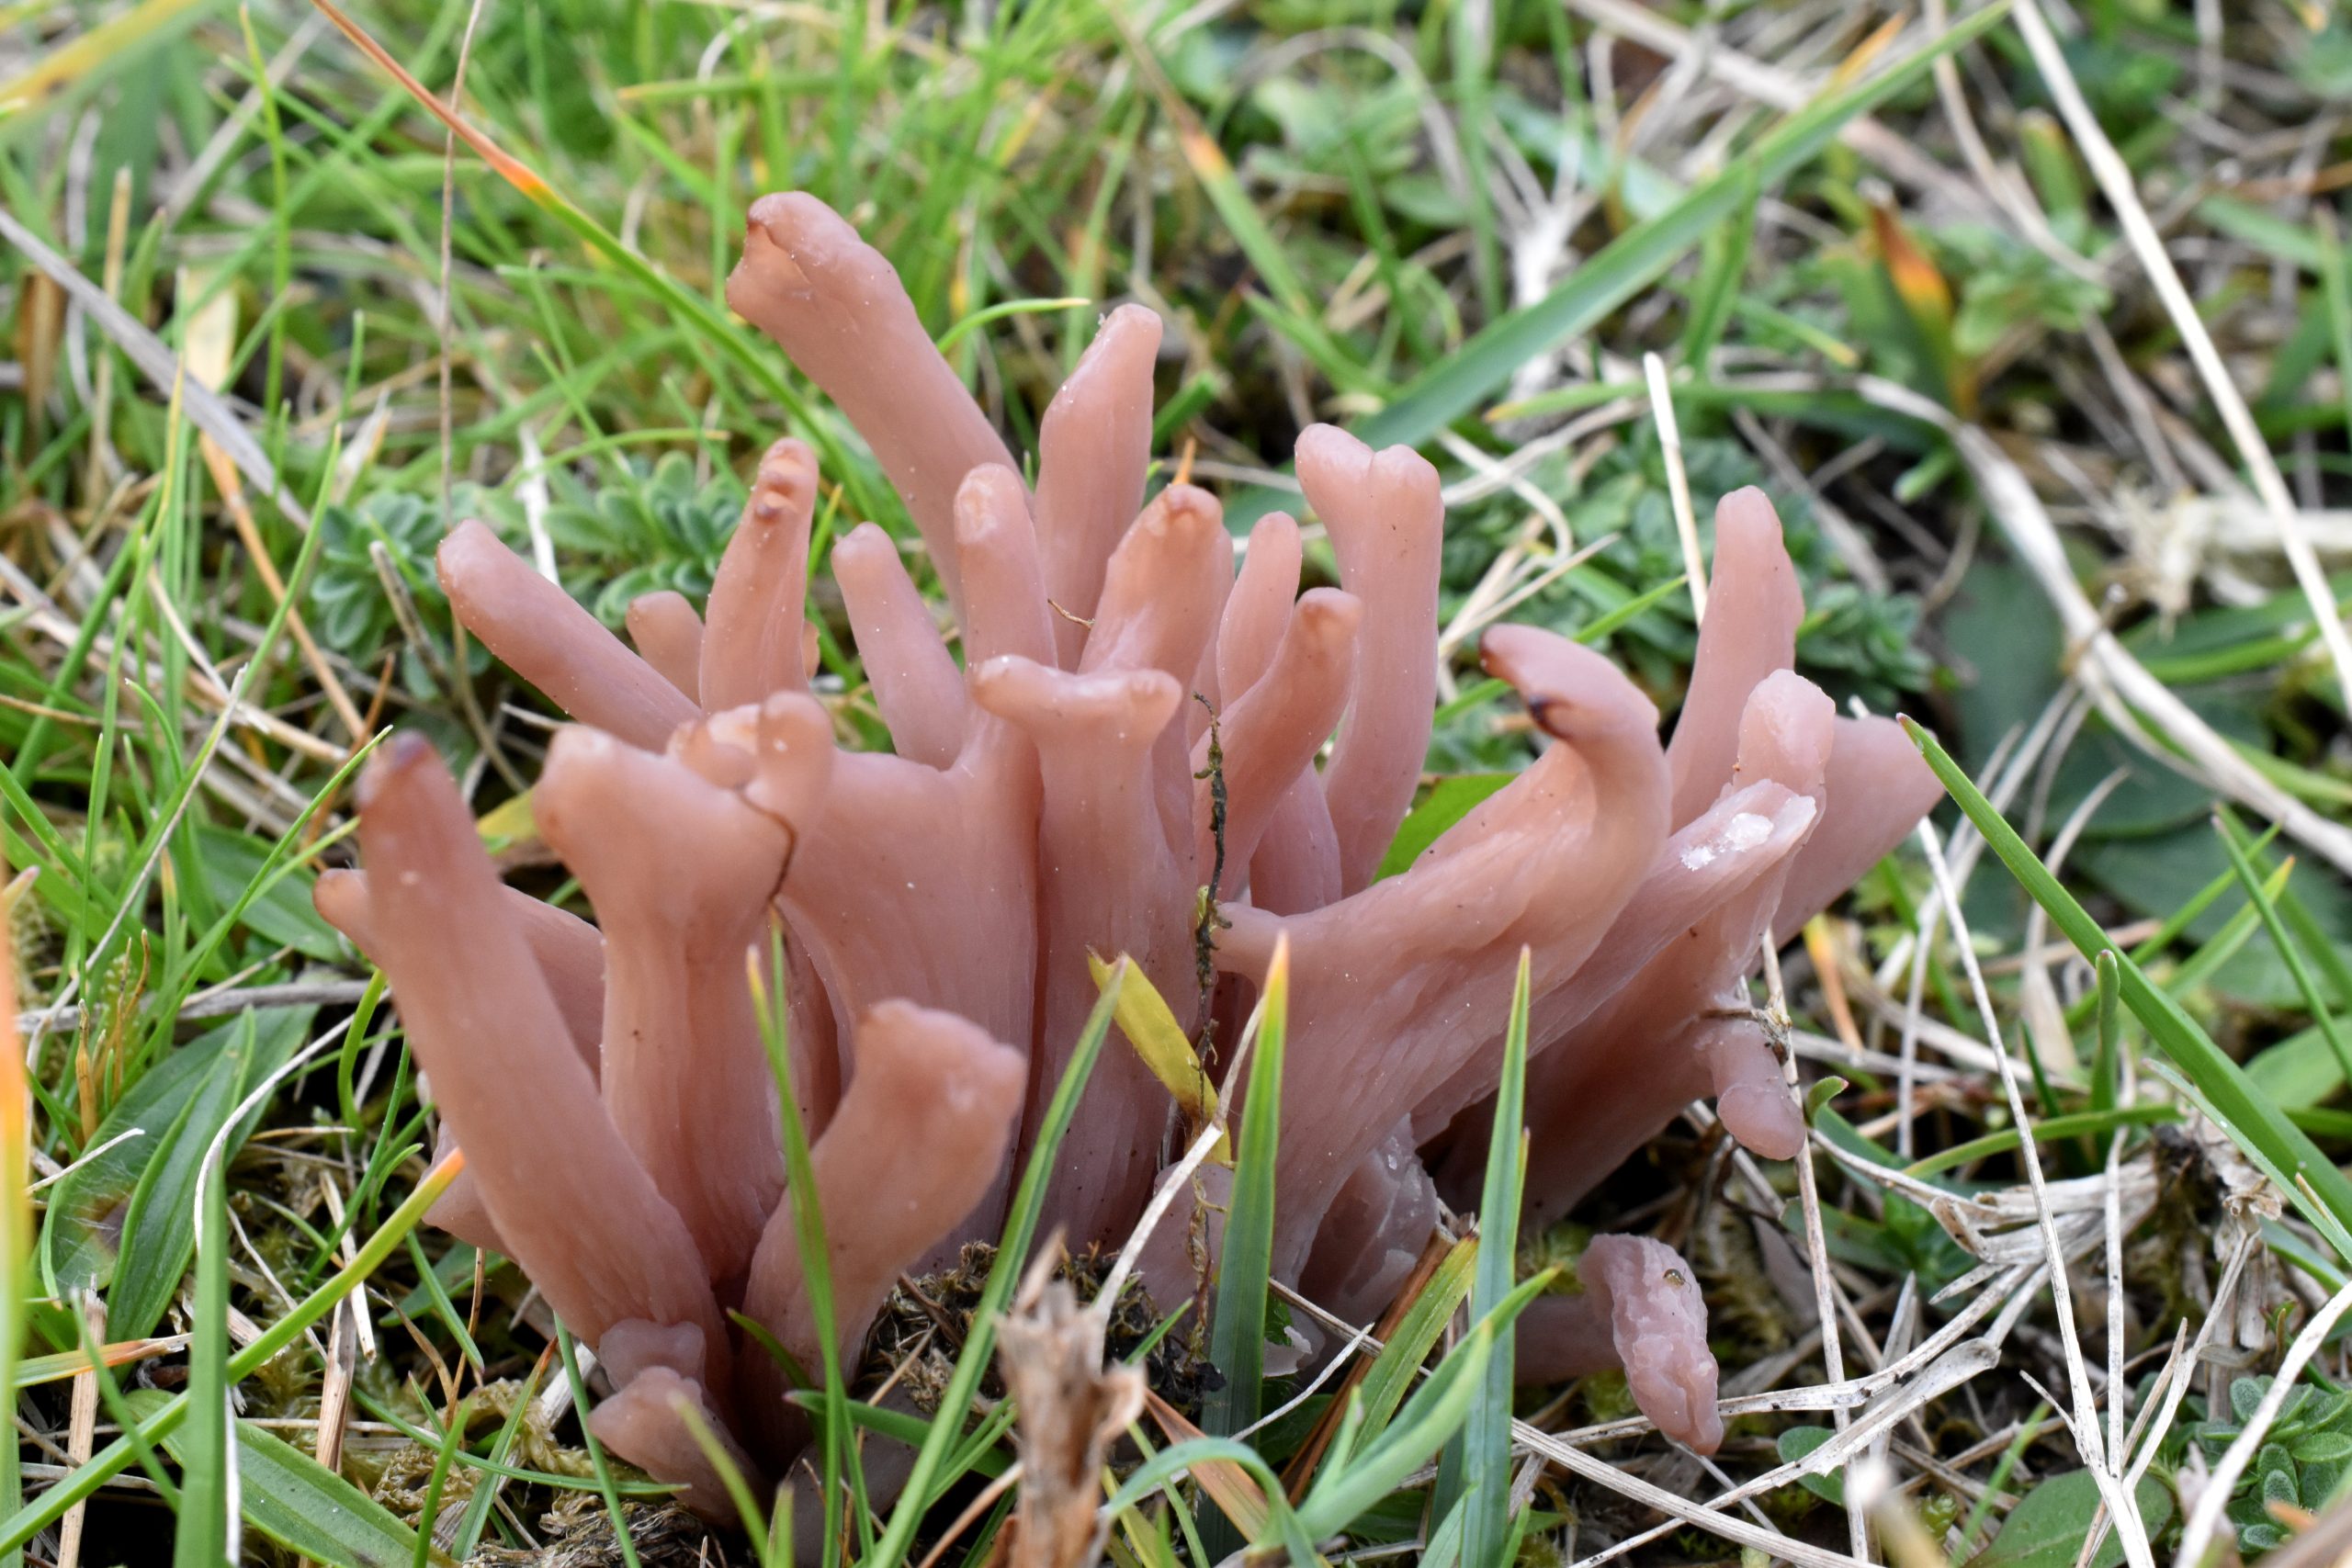
This is a good length sequence of 600 base pairs. Ideally you sequences of more than 500 but shorter sequences can still tell you things. Now I go to the internet and compare this sequence with sequences on global online databases. The best ones for fungi are GenBank and Unite. GenBank has many more sequences but is messy with many incorrectly labelled sequences. Unite is a managed databases but has less sequences. My first stop is GenBank and I run a BLAST on my sequence. I can paste the sequence into the box at the search page and run the BLAST. It comes back with a lot of hits. The sequence above has the nearest sequence with a 99.66% match as Clavaria calabrica, a fairy club and the nearest sequence is of the type specimen which is absolutely ideal. This was my second ever sequence and that is a new British record from Little Deer Park ASSI near Glenarm. It looks like Clavaria fumosa but note the clubs branch at the tips.
Most sequences are not as clear cut. The target is a match of 98.5% to a type (original) specimen. 95% is miles away. At 90%, you could be in a different genus. The next thing to work out is if the things your sequence is near to really what they say they are. So, then you have to go hunting in the literature looking for the most recent research in that group. A good paper will list the GenBank IDs of the sequences that they looked at which means you can take those sequences and build up what I call a library file of known sequences. You can then draw a phylogenetic tree placing your sequences in with the latest research and be more confident of the results.
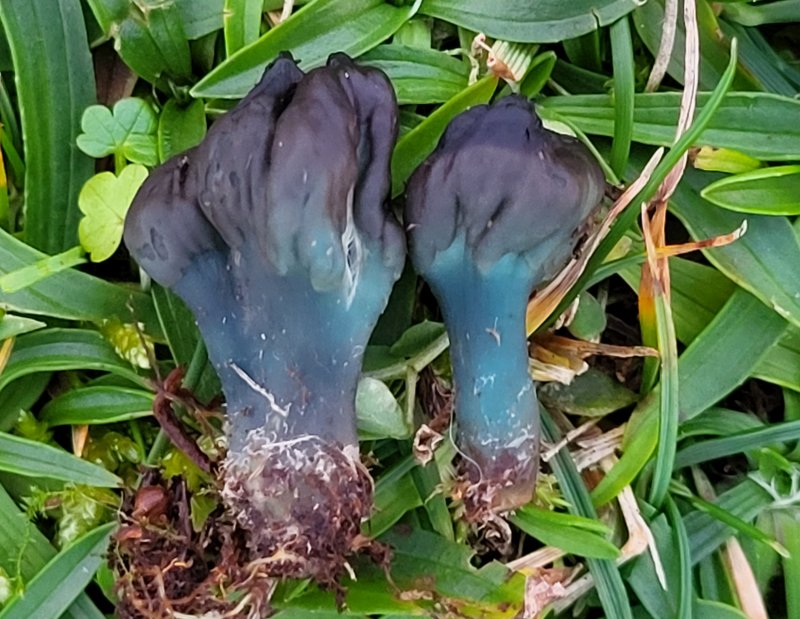
Of course there are times, you get no sequences near to what you have. In these cases, I have been contacting researchers to discuss them. In this way, we have a Hodophilus found on an NIFG foray at Divis away in Slovakia to be included in the description of a new species and have a mystery Pseudoomphalina from Rathlin that has provoked discussions with researchers in Newfoundland and Estonia that could well be new to science….
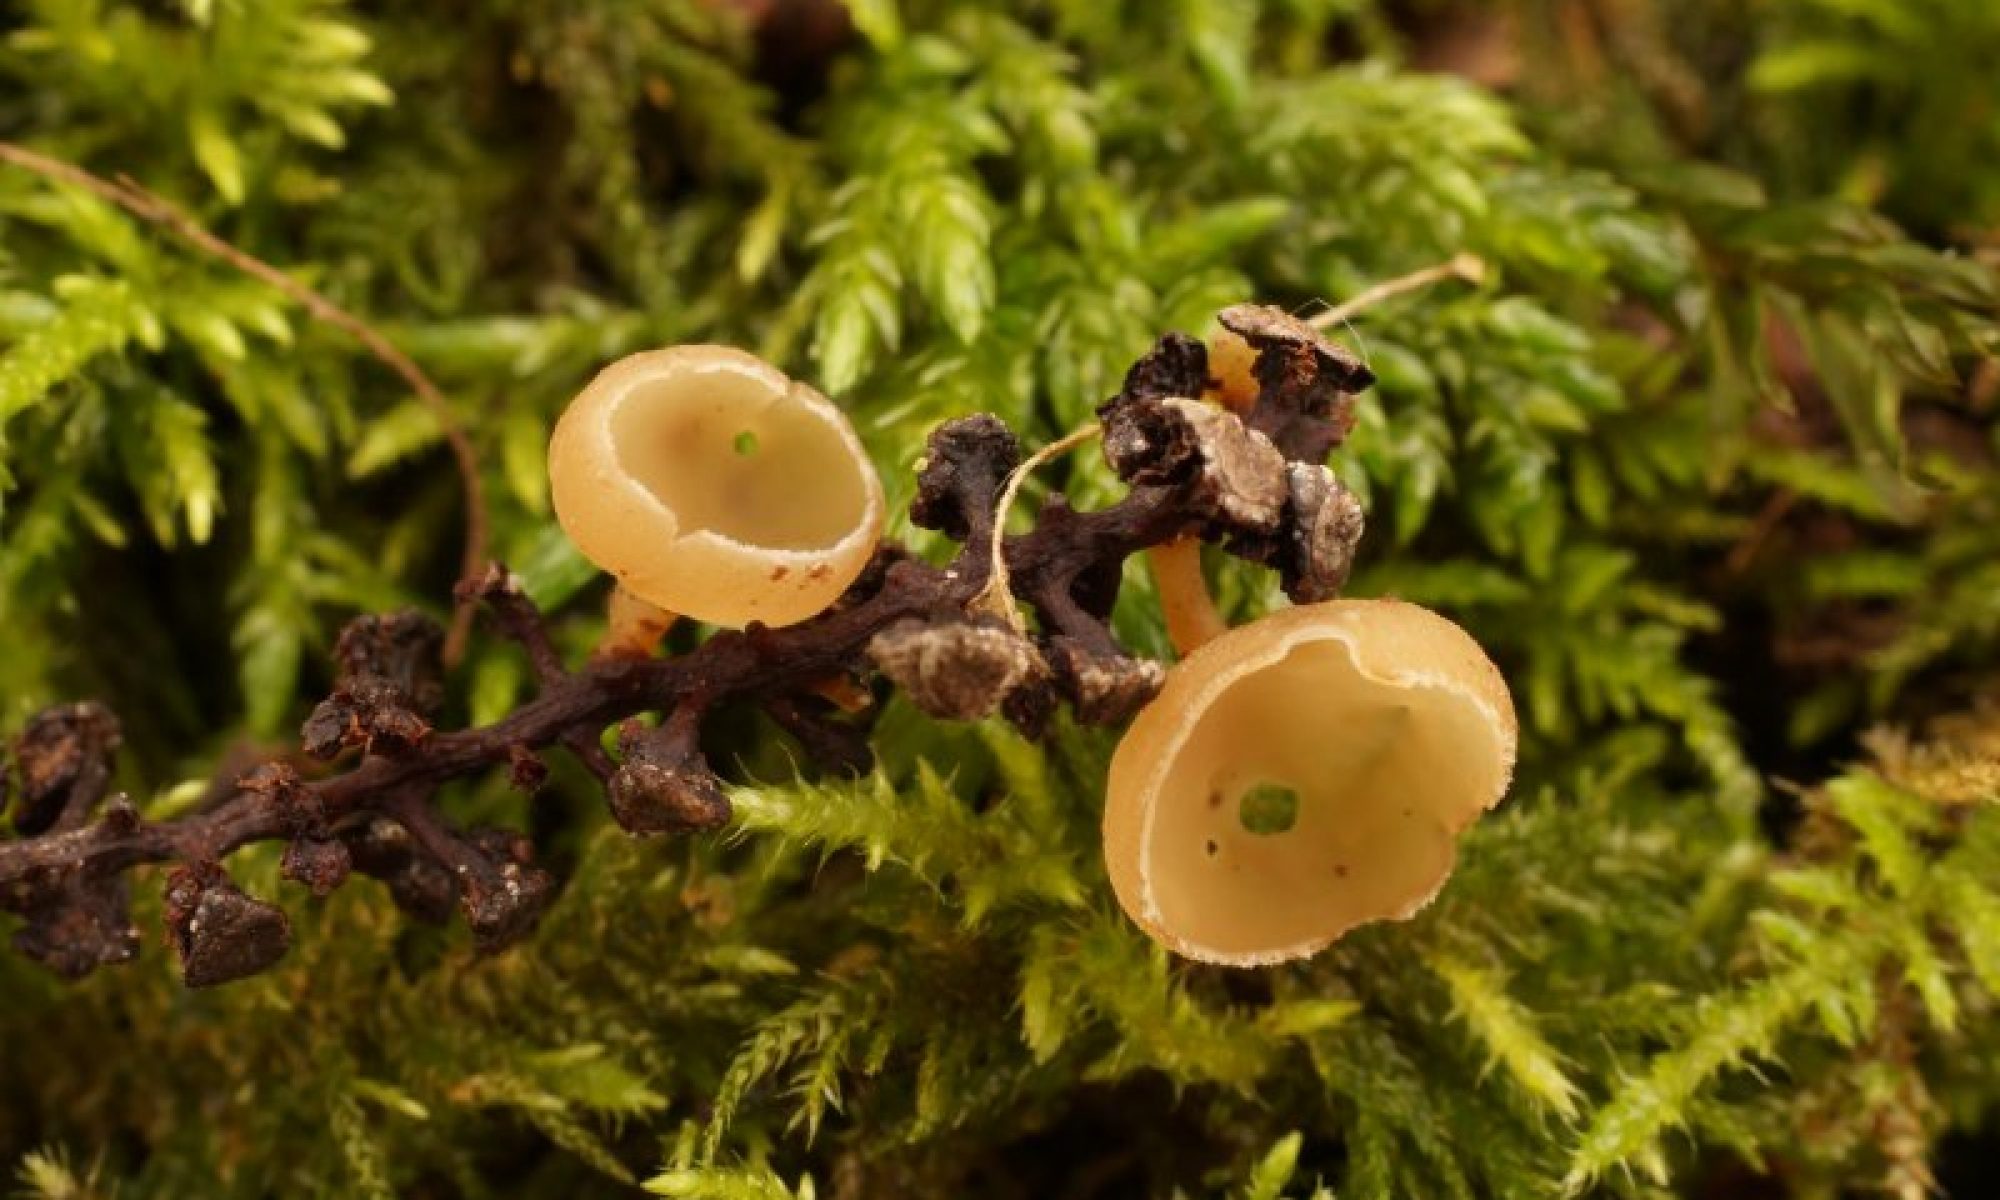
Our mystery Pseudoomphalina. Photo by Hazel Watson
All in all, so far, 7, possibly 9 species have been new to Britain, 33 species new to Ireland so it has been very successful. The whole process is exciting but is very costly (thank you CEDaR), time consuming and can be very frustrating when it goes wrong. But it is certainly changing our knowledge of what is out there.
Microglossum clavatum, new to Britain. Found by and photo by Maia Taylor at Ballyquintin Point