This page tries to give a few hints on how to record fungi. Not all issues are covered by any stroke of the imagination!! Click on any topic below that interests you.
- Taking a spore print
- How to take a grid reference
- What books to use
- An Excel Recording Sheet
- Guide to chemicals for fungal microscopy (this page is on the North West Fungus Group’s website)
- Where to buy chemicals for studying fungi
- How to collect, dry and preserve fungi
- Scanning fungi
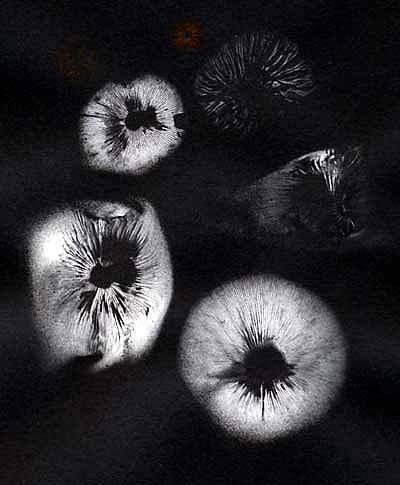
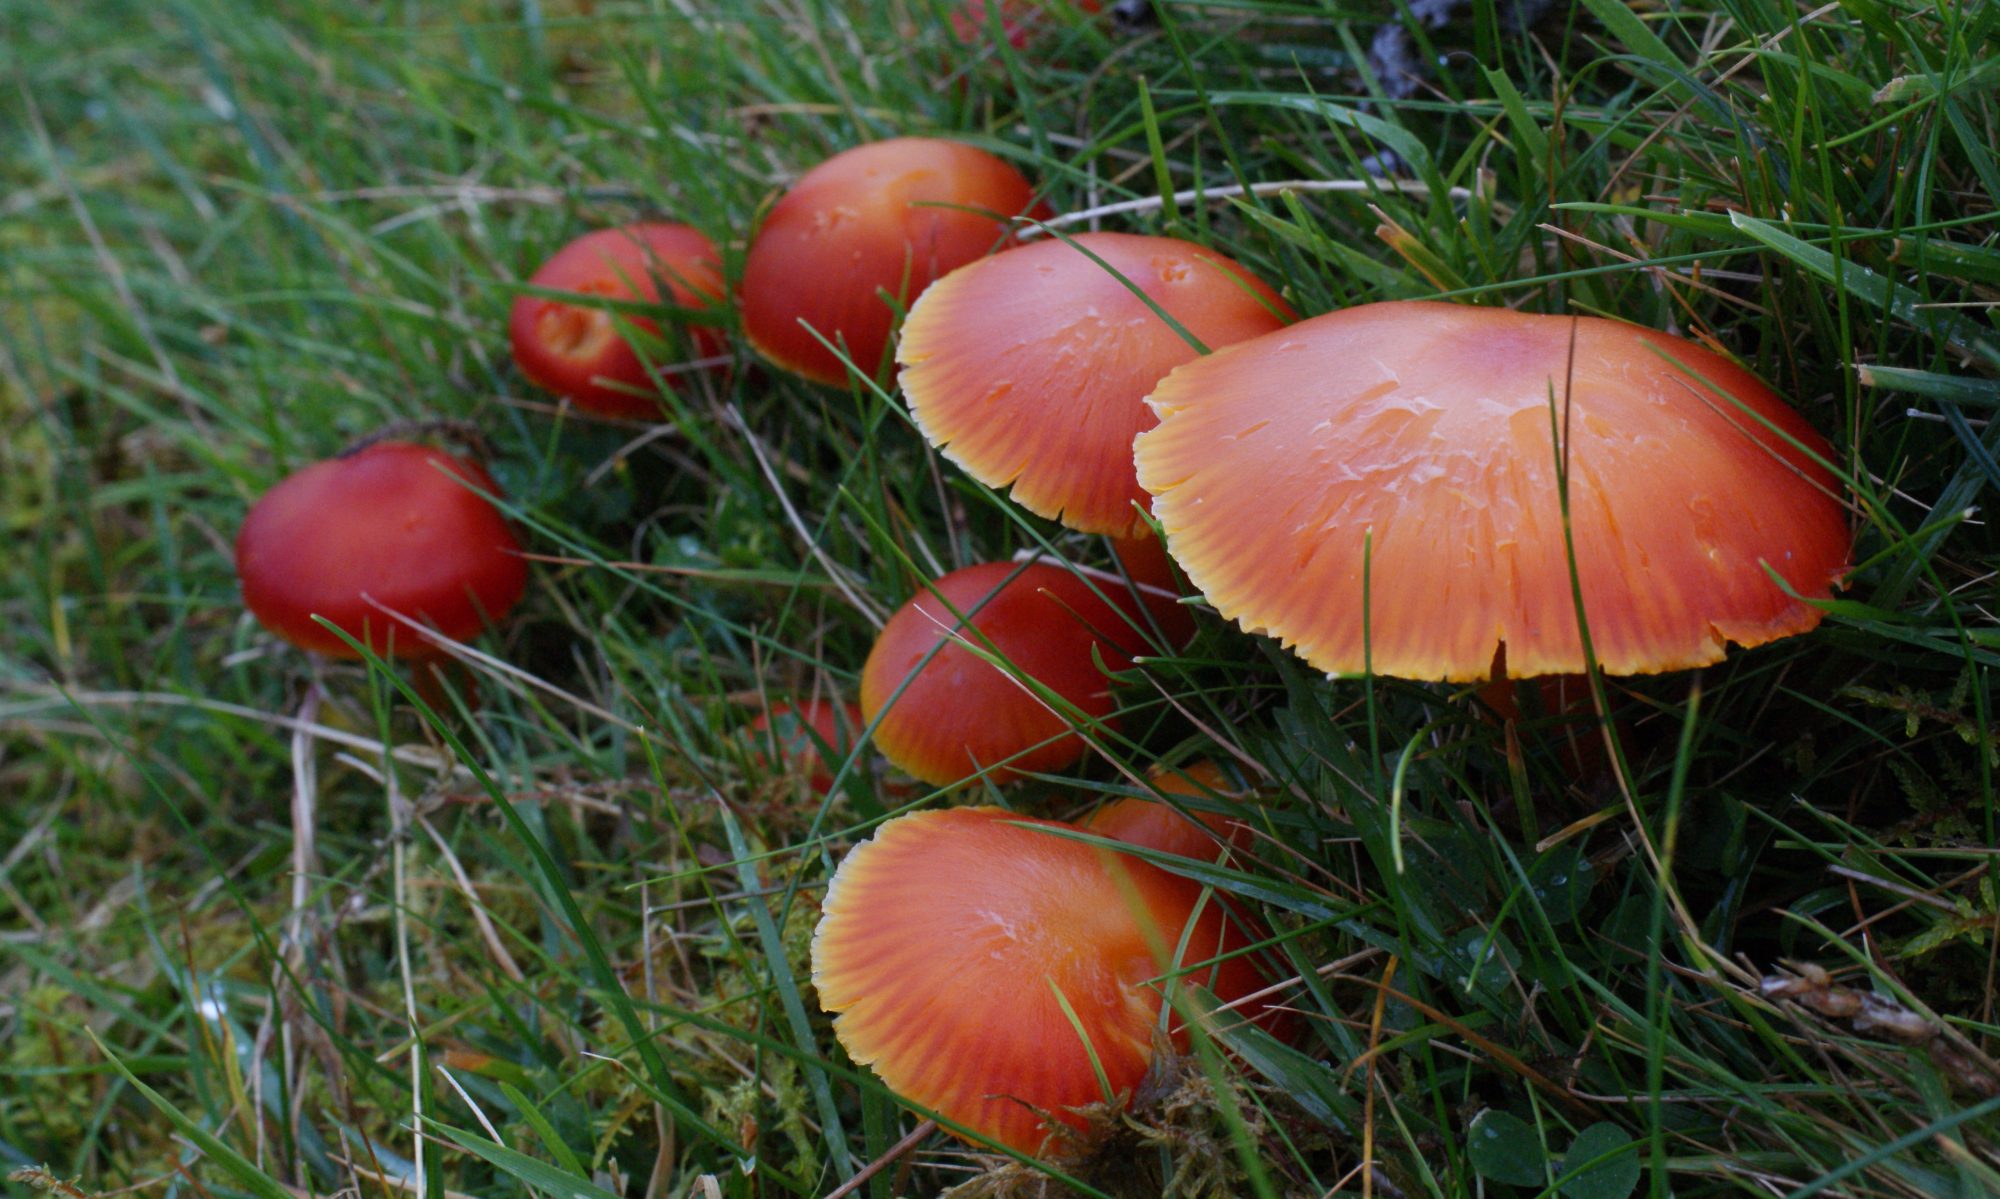
Photo by Joan Shannon
Taking a spore print is one of the first things you should do when trying to identify a fungus. It is important to work out the spore colour, but also when you want to measure spores as using spores that have “dropped” means that they are mature and hence the correct size. It is too easy to measure immature (hence smaller) spores if you just take a squash of the gill. It is very easy to take the print. Put the cap on paper or a microscope slide and leave for a few hours. You can protect it by putting a cup over it. Sometimes, if a fungus is dry, leave it to take the print in the fridge and this can encourage it to drop spores. I use a shoe box with knitting needles inserted the length of the box. The knitting needles are so spaced so that a microscope slide fits over them. The fungus can then be put onto the slide and you don’t have to cut the stipe off as it hangs down into the box.
All biological recording should involve a six figure grid reference indicating where that record was found. To be able to find out the six figure grid reference is, you are first of all going to need one of the Ordnance Survey 1:50000 series maps. Any map at a larger scale (i.e. less detailed) will not allow you to take a six figure grid reference which means that it is accurate to 100m. There are 18 1:50000 maps covering Northern Ireland and they are readily available at large book shops.
A grid reference comes in the form of a letter followed by in this case, six numbers. The whole of Ireland is divided into 100 kilometre squares which all have a letter identifying them. There are five different 100 km squares in Northern Ireland. “J” basically covers County Down, part of Armagh and southern Antrim. “D” covers northern Antrim, “C” covers Londonderry, “H” covers Tyrone, most of Fermanagh and western Armagh. “G” covers the very western part of Fermanagh. You can find very easily which square you are in by looking in the legend of the 1:50000 map as it shows near the bottom right corner which grid letters are found in the area that that map covers.
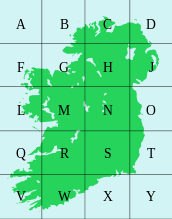
The next step is to sort out the numbers. The first three numbers of the set give detail down to 100m accuracy of the “eastings” i.e. the lines that cross the map vertically from west to east. The second set of three numbers give details of the “northings”, i.e. the lines that cross the map horizontally from south to north. So if the grid reference was J456789, the J would tell you that you are in the south east of Northern Ireland, the 456 would tell you which of the vertical lines to look at and the 789 would tell you which of the horizontal lines to look at. If you have a grid reference of J000000, this means that you are in the very bottom left hand corner of the 100km square and J999999 is likewise the very top right corner.
So the letter gives you 100 km accuracy. Looking at the set of three eastings numbers, the first number tells of the 10km accuracy, the second number tells of the 1km accuracy and the last number gives the 100m accuracy. If you were giving a four figure grid reference, the first two numbers would relate to the eastings and the second two to the northings, but the accuracy would only be to 1 kilometre.
So if you have found on the map where the fungus was that you had found, once you have worked out which lettered square you are in, you then have to find out the six figure reference. Note that there is a regular numbered grid covering the map and that each line is marked at the edge of the map by two numbers (these two numbers are repeated on the map at intervals making it easier for the map reader). These are the eastings (at the top and bottom of the map) and the northings (up and down the two sides of the map) to 1km accuracy so this immediately gives you most of the numbers. Looking at the point where you have found the fungus, first follow the line to the left of the point to the top or bottom of the map to find its number. This gives you the first two numbers of the eastings. Then follow the line below the point to the side of the map and this gives you the first two numbers of the northings. It has to be done in this order as eastings always come before northings and the numbers always go from left to right and bottom to top.
Finally, to work out the grid reference to 100m accuracy or the third number in the three digit eastings and northings sets, you then have to estimate how many tenths the point is from the left hand line and the bottom line. Using a ruler often helps in the beginning, but you soon develop an eye for it.
It really is not hard to do, but the thing just to remember is get the numbers in the right order. Putting the northings before the eastings is.
GENERAL
- The Collins guides are some of the best places to start. There are two “current” guides – one by Paul Sterry which has photographs of the species and the other by Stefan Buczacki which has drawings. Choose which you prefer. Photos are more “real” but cannot always show all the things you need to see whilst drawings can.
- To treat yourself, get Geoffrey Kibby’s Mushrooms and Toadstools of Britain and Europe vols 1 and 2 from say NHBS. Geoff is one of Britain’s foremost mycologists and also a very talented artist and the illustrations are superb.
- The Danish Fungi of Temperate Europe (two volumes) is also a supurb general introduction
FOR THE MORE SERIOUS
- Funga Nordica is the place to start. Full keys to 3054 species of basidiomycetes but is now very hard to get now.
Then there are the books that specialise on one group.
- Geoff Kibby’s book(lets) on the major genera are a great place to go:
- British Boletes
- The Genus Agaricus in Britain
- The Genus Amanita in Great Britain
- The Genus Russula in Great Britain
- The Genus Tricholoma in Great Britain
- British Milkcaps
- The Fungi of Northern Europe series
- Vol 1: The Genus Hygrocybe: Boertmann, D. (1996): The genus Hygrocybe. Danish Mycological Society. The excellent book on waxcaps.
- Vol 2: The genus Lactarius. Heilmann-Clausen, J, Verbeken, A. & Vesterholt, J. (1998): The essential book for the milk-caps. Photography is excellent.
- Vol 3: The Genus Hebeloma. Vesterholt, J.
- Vol 4: The Genus Tricholoma. Chrishtensen, M. & Heilmann-Clausen, J
- Vol 5: The Genus Mycena s.l. Aronsen, A. & Læssøe, T.
- Vol 6: The Genus Psathyrella
- Pegler, D et al (1996): British Puffballs, Earthstars and Stinkhorns. Kew. The book for the Gasteroid fungi.
- Pegler, D et al (1997): British Chanterelles and Tooth Fungi. Kew. Includes Hydnellum, Sarcodon, Phellodon.
- Galli, R. There are three book in Galli’s series which although written in Italian, does have English keys. “Le Russule”, I Boleti” and “I Tricolomi” are all very ggod buys.The thing that marks these books out in particular are their fantastic photographs.
- Sarnari, M.: Monographie illustrata del genere Russula in Europa vols 1 and 2. In Italian with English keys, this is the bible for Russula in Europe.
- Ryvarden, L & Gilbertson, R. European Polypores, Vols 1&2. Again, an essential book if into Brackets.
- Ing, B.: Myxomycetes of Britain & Ireland. Again, the book.
- All the Ellis and Ellis books on non-gilled fungi and microfungi.
Most of these specialist books can be obtained like Summerfield Books or the Natural History Book Society.
Getting an image of a fungus when it is fresh often helps identify the species, but also provides images for this website! You may not always have your camera at hand, so scanning fungi is very simple alternative. Any scanner can be used. Just place the fungus on the scanner and experiment. Scan at a high dpi (dots per inch), say 300 or higher, which can allow zooming in and looking at particular features in detail. Just remember to clean the scanner once you are finished. Here are a few examples. Remember these are web images and the resolution of the original image is a lot better than this. It can be very interesting to scan very small fungi – even myxomycetes (slime moulds). You can even see things on the scan it is very hard to see with the eye!!
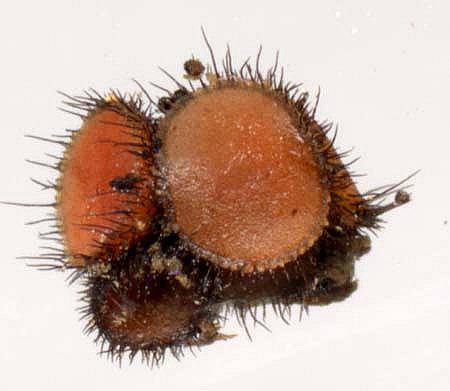
Scutellinia cejpii
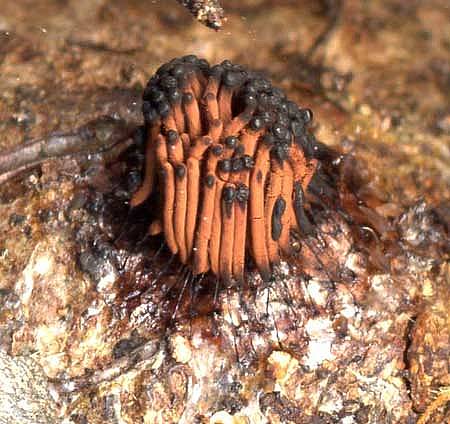
Stemonitis flavogenita